Hosting a Static Site Using Amazon S3

Ameley Kwei-Armah
Read Time: 6 mins
30 May 2024
Category: Storage
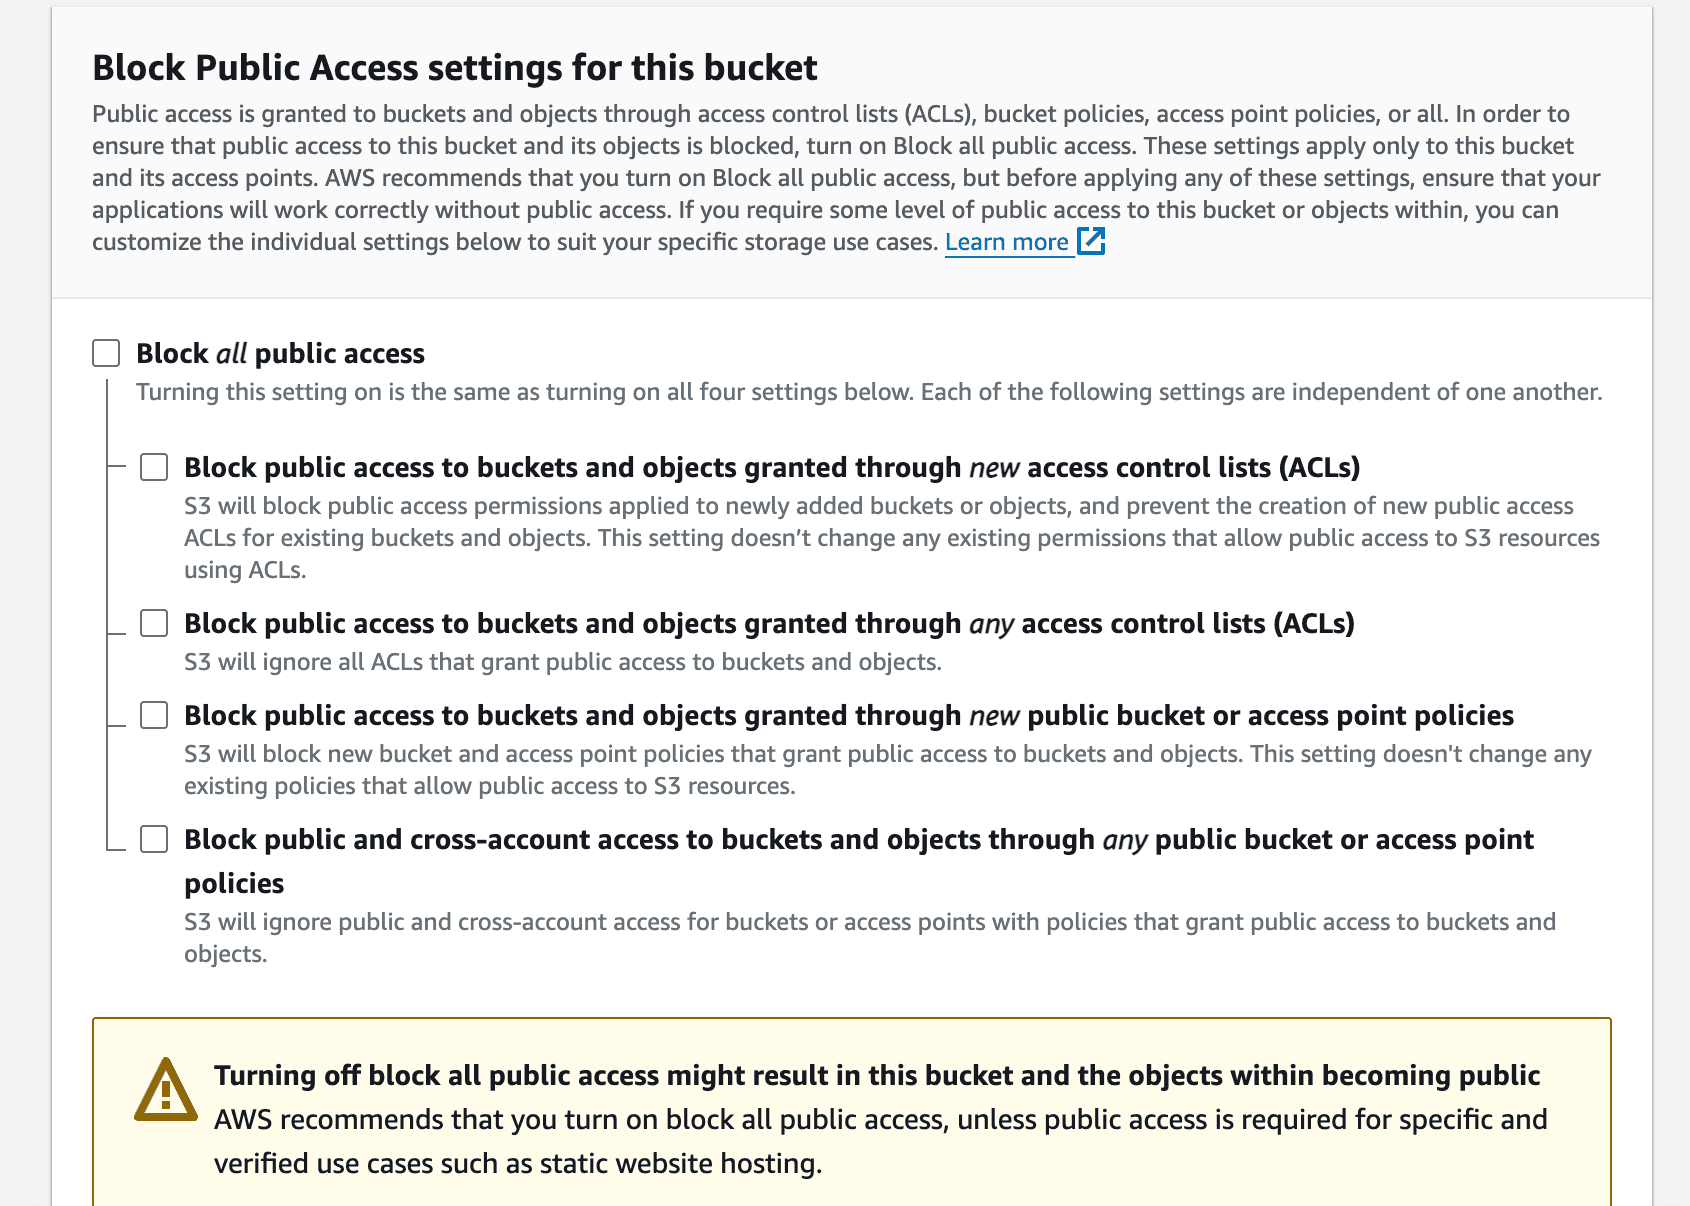
Hosting a static website in an S3 Bucket is not only simple but extremely cheap and depending on your storage size and a few other factors it can even be free. Let’s quickly discuss pricing as it can be used as a good indicator as to why you might want to host a static site using an S3 bucket. AWS offers a generous free tier for the S3 Standard Storage class; of 5GB storage, 20,000 GET Requests; 2,000 PUT, COPY, POST, or LIST Requests; and 100 GB of Data Transfer Out each month. It is still very cheap outside of the free tier at 0.024p per GB for the first 50 TB a month. For more pricing information take a look here. Creating and Uploading Files to Your S3 Bucket So how do you host a static site using an S3 bucket? The first thing you need to do is sign into the console search for S3 and select ‘Create a Bucket’ Give your bucket a name, which has to be unique not just to the account but the whole of AWS, so you may run into errors if your bucket name is basic. Try adding numbers, hyphens etc to make it unique. Decide on the object ownership that you want for your bucket. Make sure to DISABLE “Block Public Access settings for this bucket” as this is a static site, and you want it to be accessible to the public. Be sure to acknowledge that you have allowed public access to the bucket.

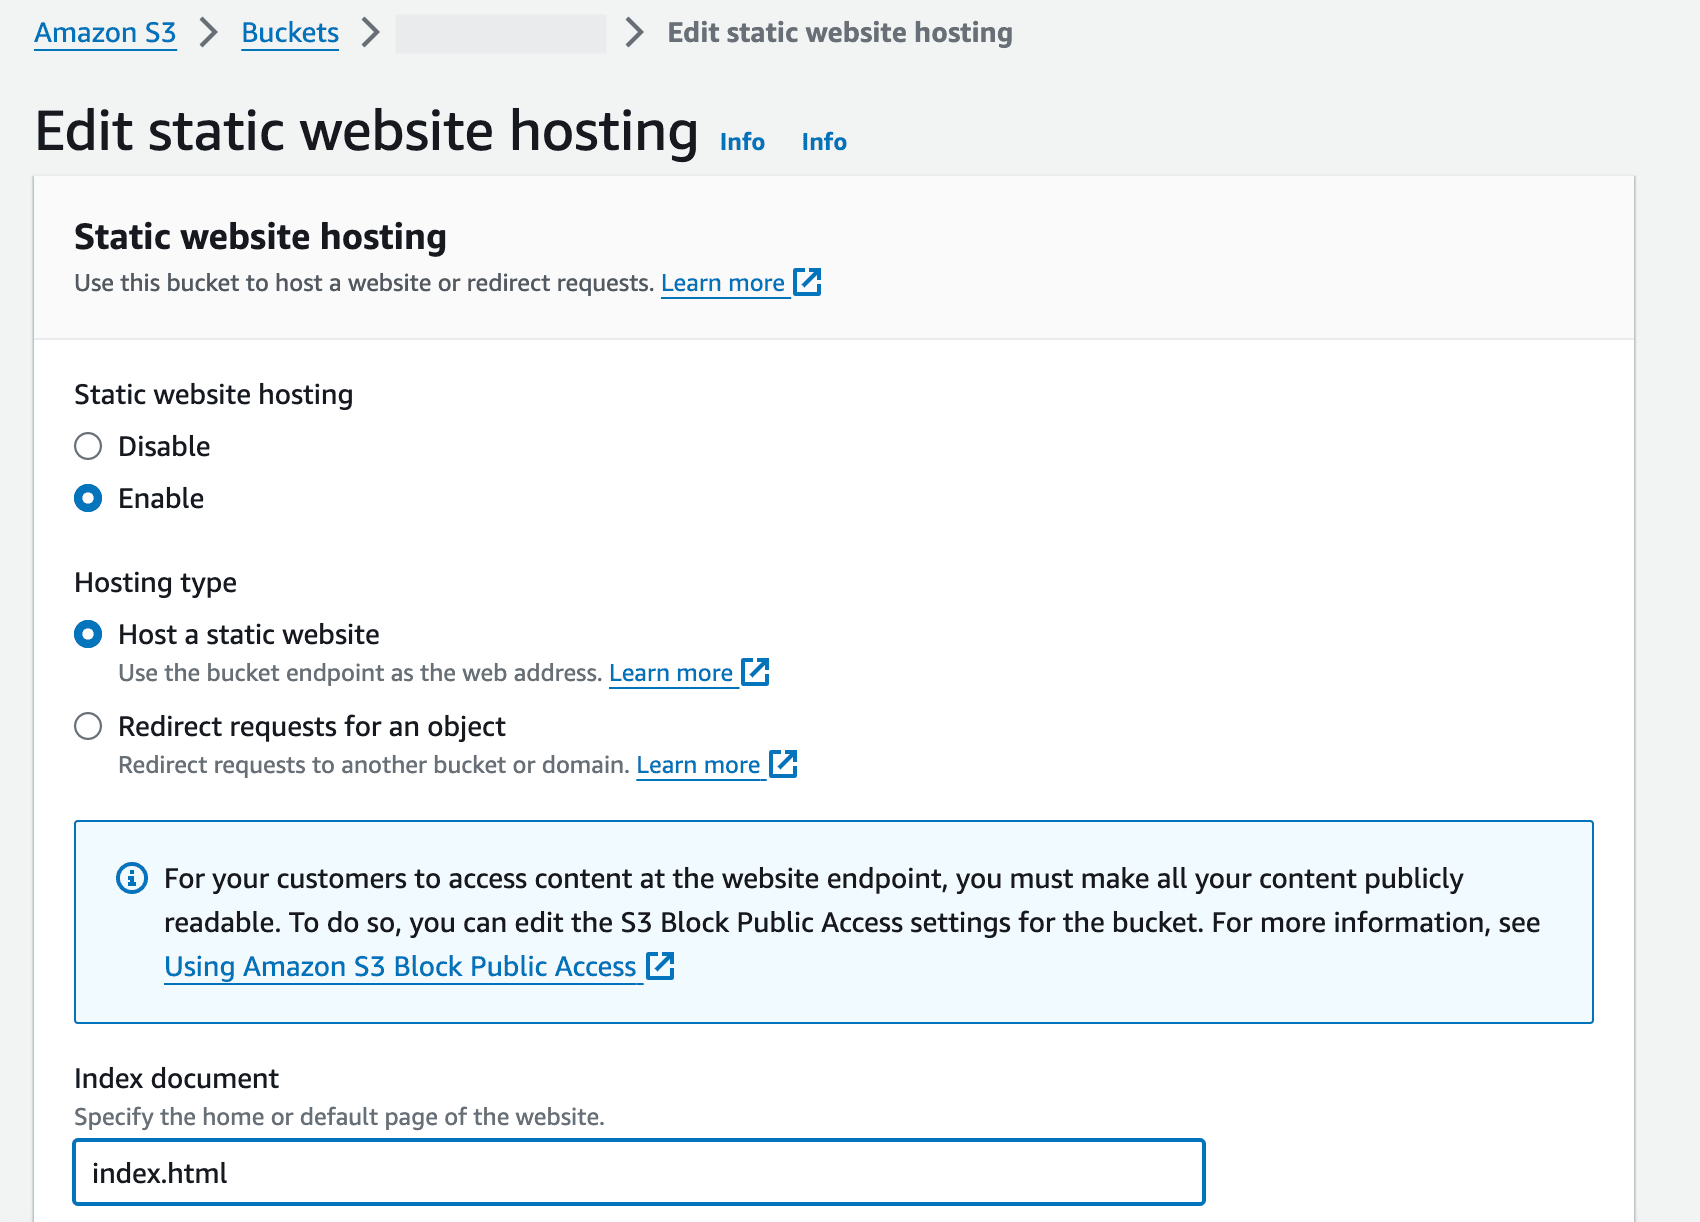
Enable bucket versioning, this will be useful later and is also an architectural best practice. Leave everything else as default unless you would like to change these settings. Then click ‘Create Bucket’ Once your bucket is created, click into it and click ‘Objects’ , choose upload and drag and drop or upload all the files and folders needed for your website. Statically Hosting your S3 Bucket Once they have been successfully uploaded navigate back to the bucket and select the ‘Properties’ tab. Right now your S3 bucket is not suitable for static site hosting and you need to explicitly make it. Scroll down on the properties tab and look for Static website hosting, click on the Edit button and select Enable and the hosting type is ‘host a static website’. Make sure to specify the home or default page for the website which is usually ‘index.html’, however, if this is different in the case of your website, make sure you put the relevant file name. Then save your changes.

You’ll then see your bucket end point which is the URL address that your site is accessible at. However, if you click this link you will get a 403 forbidden access error. This is because although your S3 bucket is public and has static web hosting enabled, we haven’t given the bucket the necessary permissions to truly be accessible to the public. So let’s do that now. Navigate back to the bucket and click on the ‘Permissions Tab’, scroll down to ‘Bucket Policy’ and select Edit. Copy the below bucket policy to allow public access to your S3 bucket. Be sure to change <YOUR-BUCKET-NAME> with the actual name of your bucket.
{
"Version": "2012-10-17",
"Statement": [
{
"Sid": "PublicReadGetObject",
"Effect": "Allow",
"Principal": "*",
"Action": "s3:GetObject",
"Resource": "arn:aws:s3:::<YOUR-BUCKET-NAME>/*"
}
]
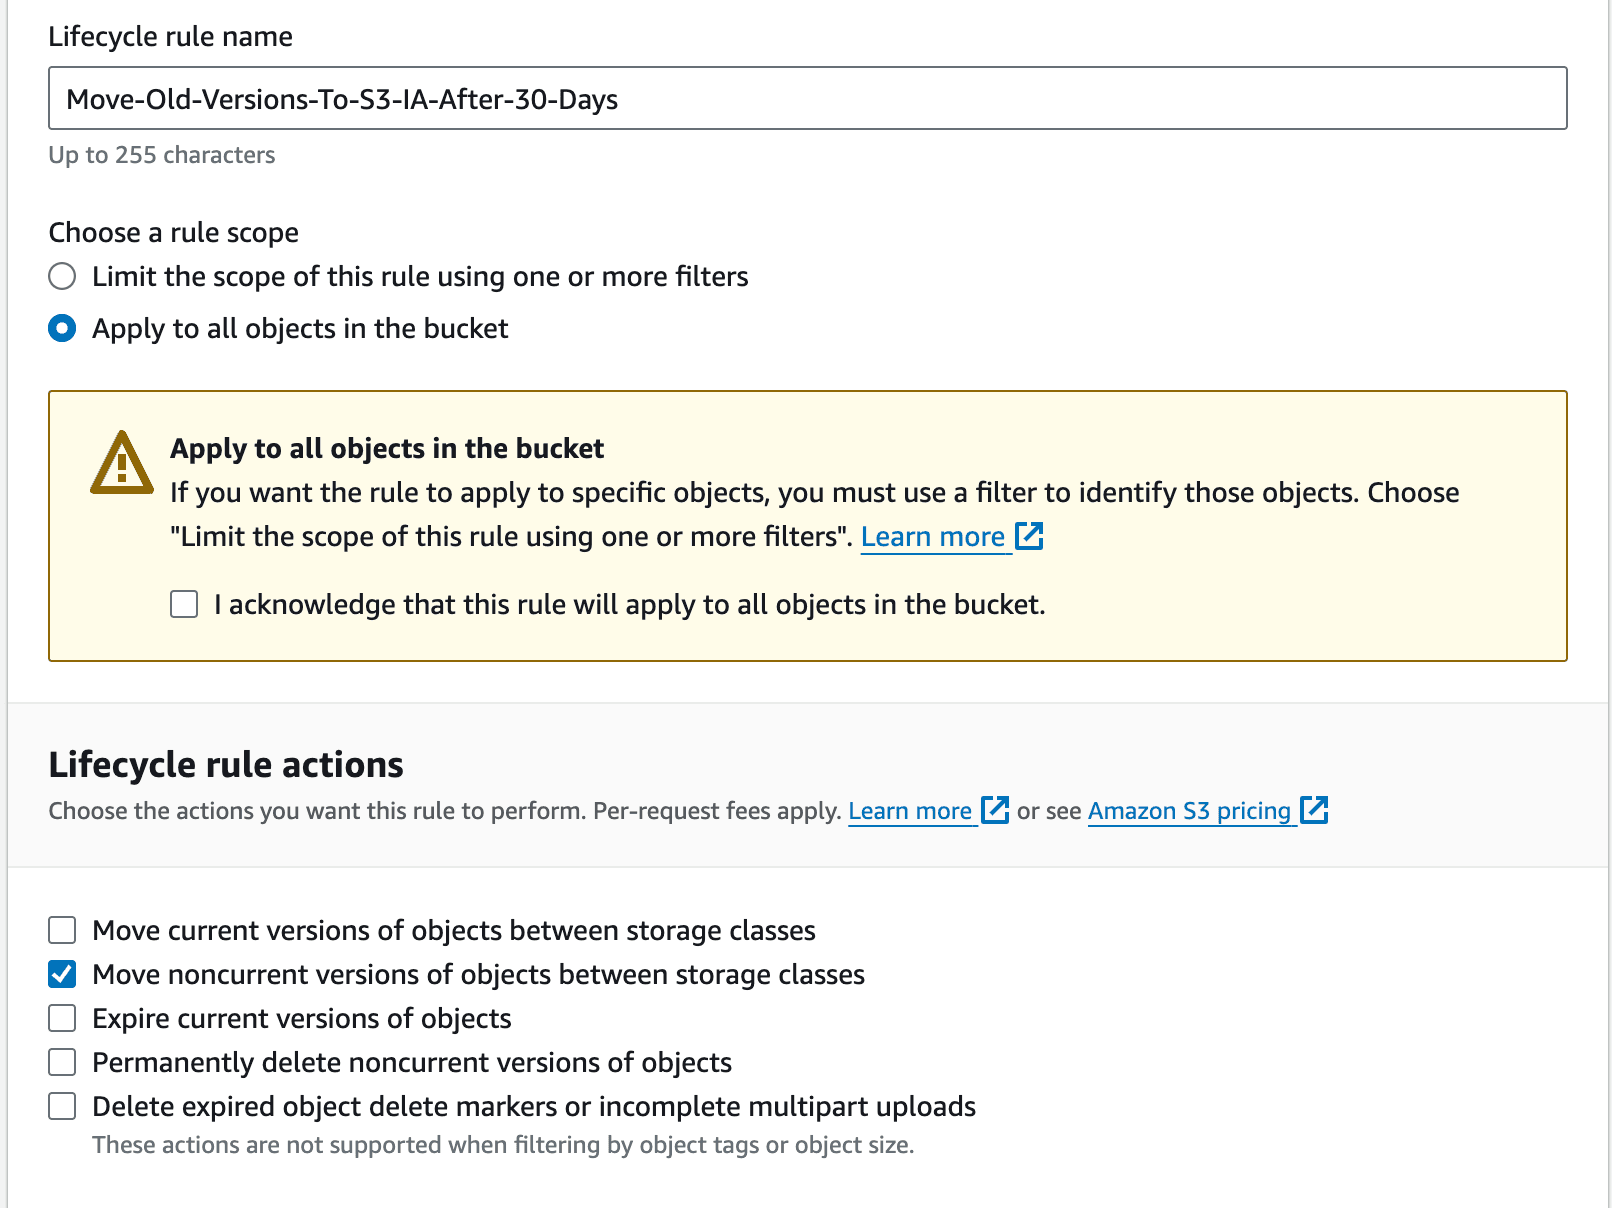
} Once you’ve saved this bucket policy if you navigate to properties and select that endpoint, your website should now be live and publicly accessible! The following parts are optional but highly recommended. Optional – Creating Life Cycle Policies Since you enabled bucket versioning on your S3 bucket – this means that when you upload the same file that you have edited, it doesn’t replace the file but creates a new version that becomes the current version and what the public sees. Bucket versioning is useful for many reasons and is straight-up and architectural best practice. What does this have to do with life cycle policies? Well, bucket versioning is free; however, each version counts as an object and therefore adds to your storage costs. In order to ensure you are optimizing your bucket to be cost-efficient you create life cycle policies that will remove non-current versions into a cheaper storage class and then eventually delete these versions to save on your storage costs. Navigate back to your bucket and select the ‘Management’ tab. Select ‘Create Lifecycle Rule’. You can create as many rules as you see fit. For my buckets, I created 2 rules, one that moves my non-current versions into the S3 infrequent Access bucket after 30 days and another that deletes non-current versions after 60 days. Name your life cycle rule, and decide if you want it to apply to all objects in the bucket or just specific objects. Then select your lifecycle rule, be careful to make sure your rule is applying to NONCURRENT versions (unless you want it to apply to current versions).

Optional – Bucket Replication Rules This step is also optional but again highly recommended as it is a disaster recovery method. First, select a different region from the one you currently have your S3 bucket in. Follow the steps you did above to create a bucket however, DO NOT add any objects into the bucket. Go back to the region where you are hosting your original bucket and navigate to the ‘Management tab’. Find ‘Replication Rules’ and click on ‘Create replication rule’. Give your replication rule a name and keep the status as ‘enabled’. In the source bucket select ‘Apply to all objects in the bucket’. In the ‘Destination’ section keep ‘choose a bucket in this account’ selected unless your bucket is in another account and for IAM select ‘Create IAM role’. Leave all the other options as default. Then click ‘Save’. If you want to you and/or you have many files in your original bucket you can choose to do a one-time batch load. Do keep in mind this does come with a cost depending on how many objects you and replicating. If not, you can always just manually reupload the files. You will then find any new files you upload into your original S3 bucket will automatically be replicated into your new bucket. Just so you know, replication rules only reproduce objects, object metadata, object tags and encrypted objects into your new bucket. You will need to set up for example lifecycle policies, and other policies if you want it to be the same as your original bucket. And that’s, that! You’ve successfully hosted a static site using an S3 bucket, and set up lifecycle policies and replication rules!
Photo made on Canva.


